Anleitung Tasmota Firmware auf Sonoff flashen › OwnSmartHome.de
Overview S20 Smart Socket (EU/US/UK/CN plug) is a wifi wireless smart socket that can connect any home appliances and electric devices via wifi, allowing you to remote control on iOS/Android APP eWeLink. After adding the smart socket to your APP, you are able to remote turn on or off your connected devices from anywhere at any time.

Using With Sonoff S20 — ESPHome
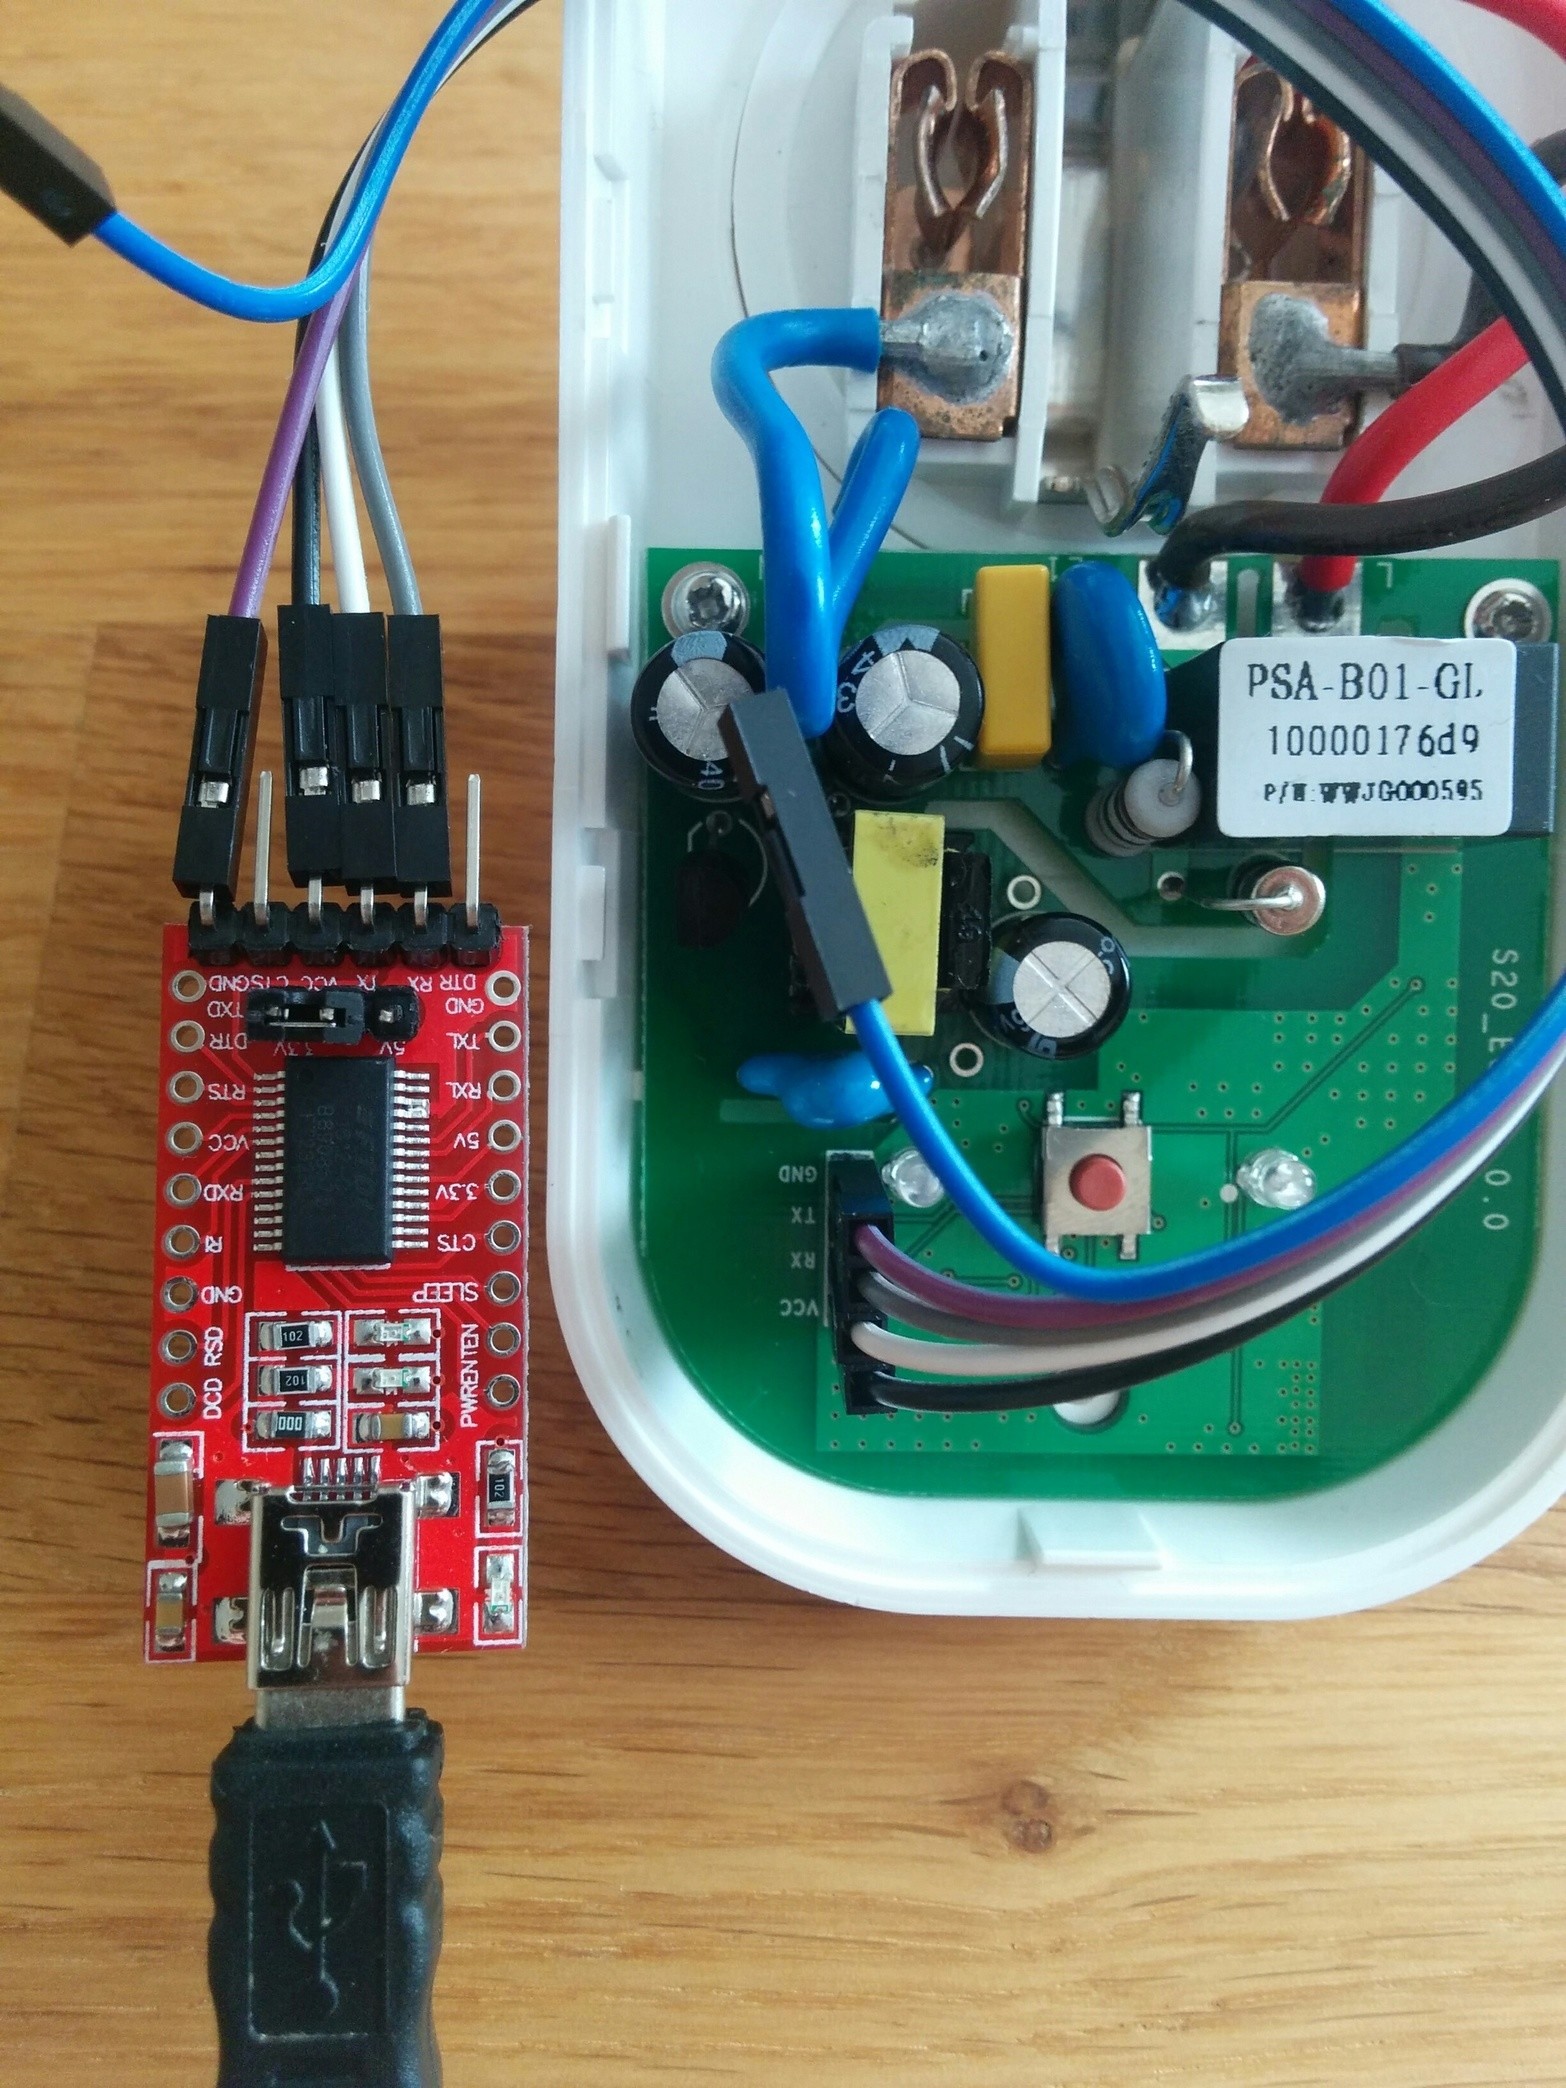
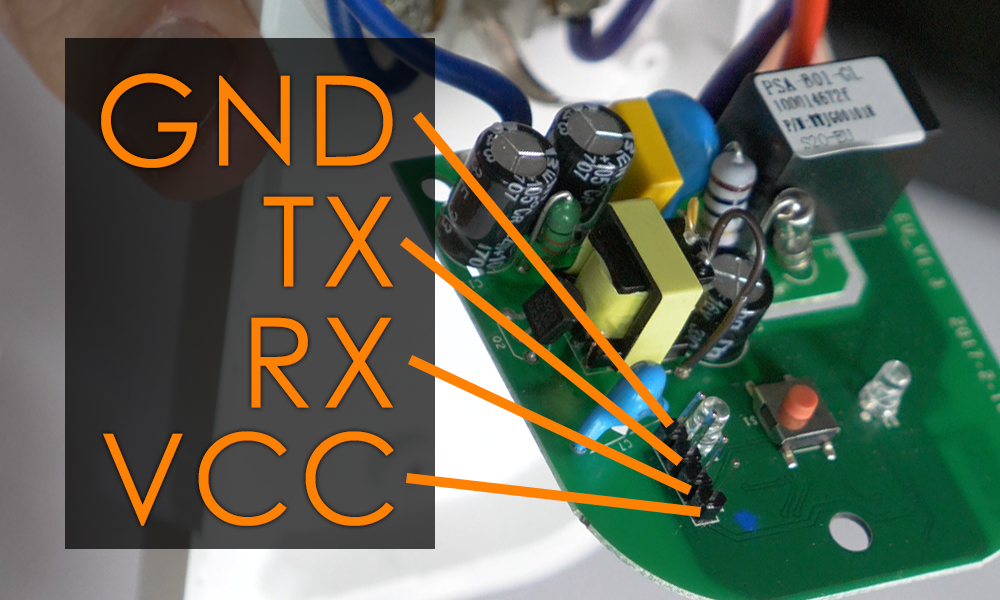
Make sure you have it set to 3.3V. Connect the wires as follows: 3.3V → 3.3V (or Vcc) Tx → Rx. Rx → Tx. Gnd → Gnd. Afterwards, while holding the push button on the Sonoff, connect the ESP8266 to your computer with USB and release the button after several seconds. Doing that enables Flash mode on the Sonoff switch.

Sonoff S20 Unser Haus
2. 3. 5. SONOFF products manual, include every products' certification, user manual, quick start and specification. Help users quick start to use.
Hacking a Sonoff S20 and adding an ACS712 current sensor Stupid Projects
13.2K subscribers Subscribe Subscribed Share 50K views 5 years ago How to set up and configure a Sonoff S20 with Home Assistant part 1 of 2. Björn and Shaun guide you through the whole tutorial..
Sonoff S20 PCB Only Firmware Tasmota Basic 230Vac PrototypeDIY
SONOFF - ESP8266 Update Firmware With Arduino IDE: This is a guide how to upload new firmware using Arduino IDE. Sonoff is a ESP8266 based WiFi wireless switch that can connect to appliance of different types and brands. This is a smart switch to control any device on 110v and 230v.See this project.
Sonoff S20 Umbau auf 868Mhz HomeMatic Abgeschlossene Projekte Deutsches Raspberry Pi Forum
Elevate your home's comfort and energy efficiency with SONOFF smart radiator valve. It's compatible with most Zigbee 3.0 hubs to seamlessly fit into your existing smart home ecosystem. You can set customized schedules to have your radiator heat up precisely when you need it. Here is to learn how to integrate it into Jeedom home automation.

Sonoff S20 Plug Configuration for Tasmota
Version: 2.2 Date: 2021-11-1 SONOFF DIY Mode Overview Do you want to control the SONOFF device via your own app or home automation platform? DIY Mode helps!

Sonoff S20 Plug Configuration for Tasmota
SONOFF S20 WiFi Smart Socket Wireless Plug Power Switch. Models. Operating Instruction. Download APP | ---|---Power on. After powering on, the device will enter the quick pairing mode (Touch) during the first use. The Wi-Fi LED indicator changes in a cycle of two short and one long flash and release.

Sonoff S20 WiFi Socket
Basic Configuration # Basic Config esphome: name: sonoff_s20 platform: ESP8266 board: esp01_1m wifi: ssid: !secret wifi_ssid password: !secret wifi_password logger: api: ota: # Device Specific Config binary_sensor: - platform: gpio pin: number: GPIO0 mode: INPUT_PULLUP inverted: True name: "Sonoff S20 Button" on_press: - switch.toggle: relay
Color & Shape Sonoff S20 with EasyESP and OpenHAB and Alexa
The Sonoff S20 is a smart socket off-the-shelf product using a ESP8266 with 1MByte Flash. Sonoff ITEAD is a brand for several off-the-shelf Smart Home WLAN devices like switches that use the ESP8266 chip. The Minimal Example can be flashed onto his device to support a remote switch with options for time based switching. GPIO usage.

Installing ESPEasy Firmware on an Itead Sonoff S20 Smart Socket YouTube
Using EmonESP on the Sonoff S20 smart plug \n. This guide details how to use EmonESP on the Sonoff S20 smart plug. The SonOff can then be turned on and off via MQTT or/and used in conjunction with the emoncms demandshaper module for appliance scheduling based on the best time to use from a grid or/and carbon perspective. See: \n
Sonoff basic схема 86 фото
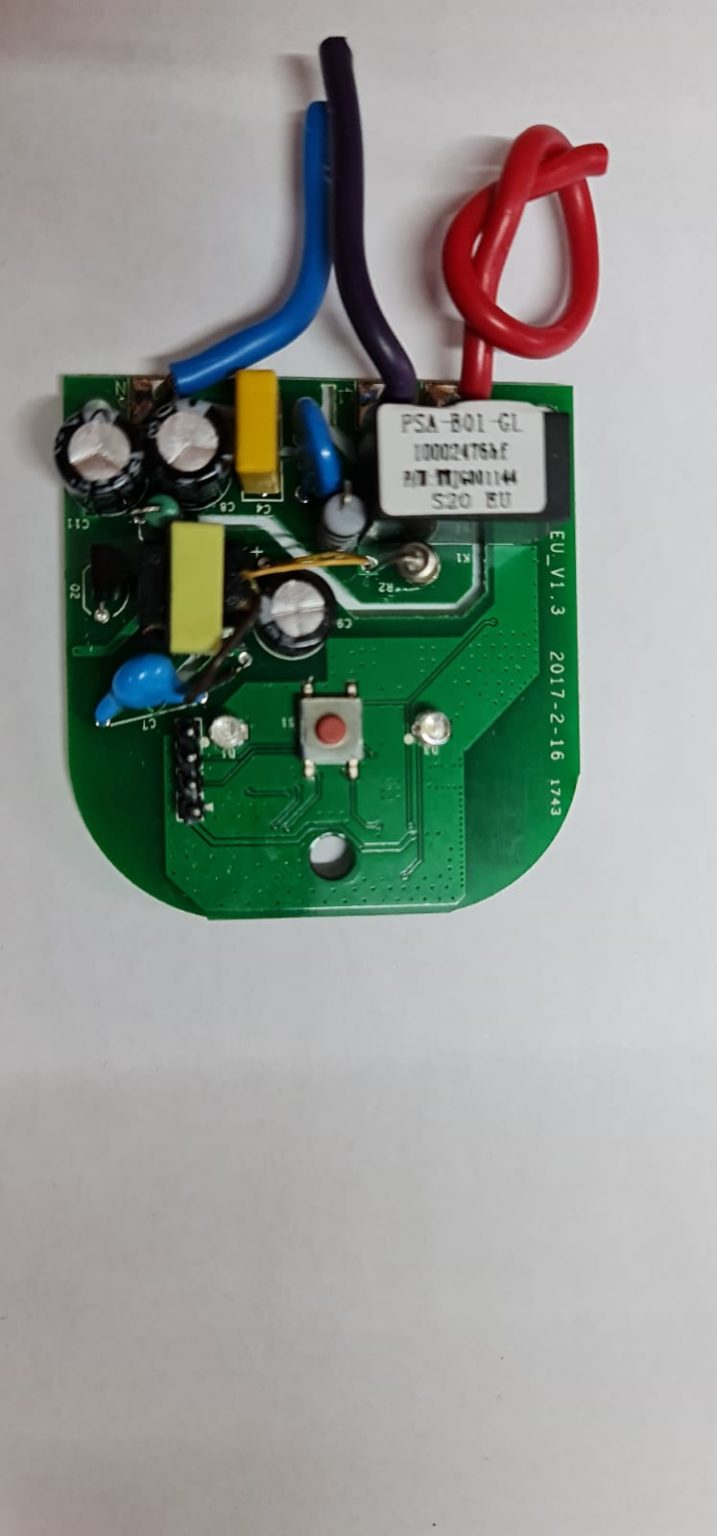
Remove the "hidden" screw. (optional) Remove the board from the plastic shell to have better access to serial pins. There are 2 screws at the red and blue wire. Be careful not to damage the soldered connection! Connect the jumper wires (no soldering needed here, can just hold the wires in contact or tape them to the external plastic).
SonoffS20 V2.1.0 Pin ELOG kann ich hier einen DS18B20 anschließen? Sonoff Touch, Sonoff
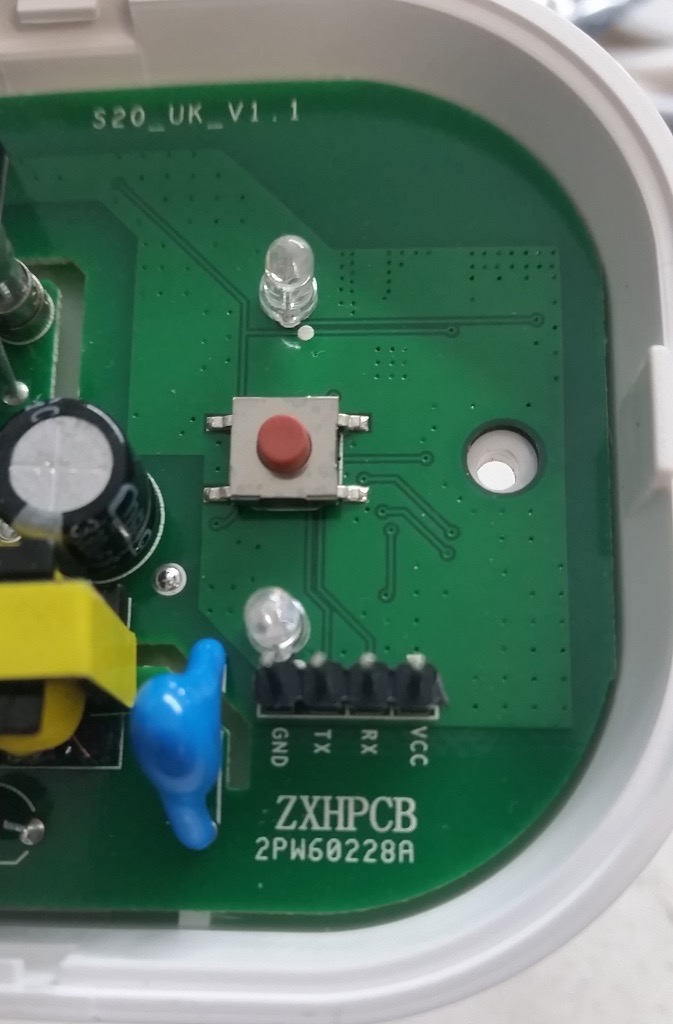
Remove the "hidden" screw. (optional) Remove the board from the plastic shell to have better access to serial pins. There are 2 screws at the red and blue wire. Be careful not to damage the soldered connection! Connect the jumper wires. From top to bottom (see image below): - Vcc (3,3V) - RXD - TXD - GND Connected?
Sonoff S20 PCB Only Firmware Tasmota Basic 230Vac PrototypeDIY
GitHub - pFenners/Sonoff-S20-Simple-Wired-Control: Turns the Sonoff S20 in to a simple on/off relay controlled by a external switch/input. Manual override. No wifi Turns the Sonoff S20 in to a simple on/off relay controlled by a external switch/input. Manual override.
SonoffTutorialReihe
Note that the PCB (at least on the Sonoff Basic (in-line switch) only has 'single isolation' distances between the low voltage section and the mains. So one should treat any part of the Sonoff circuit as mains voltage. The Sonoff-Tasmota GitHub does show connection of a temperature and humidity sensor to a Sonoff S20.

Chinese electronics products tested (141 tests) Sonoff S20 WiFi Socket tested
Step 1: Opening up the Sonoff S20 ¶ The first step is to open up the Sonoff S20. Note that you do not have to run the original firmware supplied with the Sonoff S20 before doing this step. Warning Just to repeat this: Make absolutely sure the device is not connected to any appliance or plugged in before doing this step.